By Payam Shafinia
Marketing Coordinator, After Sales
Yamaha Motor Canada
Marketing Coordinator, After Sales
Yamaha Motor Canada
One of the most misunderstood and often neglected maintenance items on an outboard motor is corrosion below the waterline. There are several ways to defend against corrosion. Understanding the process will help you stay ahead of this avoidable menace.
Corrosion requires the following components:
- an anode (the more active metal)
- a cathode (the less active metal)
- a conductive path between the anode and cathode
- an electrolyte
Virtually any metal can be an anode or a cathode depending on the metals involved. Corrosion occurs when electrons flow from the active metal (anode) to the less active metal (cathode). This starts an ionic reaction at the anode, causing it to dissolve until it’s entirely consumed.
Many metals are used to manufacture boats, but the most common metals below the waterline are aluminum and stainless steel. If these are the only two metals below the waterline, aluminum will act as the anode and stainless steel will serve as the cathode. The corrosion process will commence once the two metals are submerged and continue until the aluminum has completely dissolved, leaving the stainless steel virtually intact. While the corrosive process can never be stopped, we can protect the mechanical components by presenting a third metal that is even more active than the aluminum components on your boat, thus presenting a sacrificial anode.
Types of Corrosion
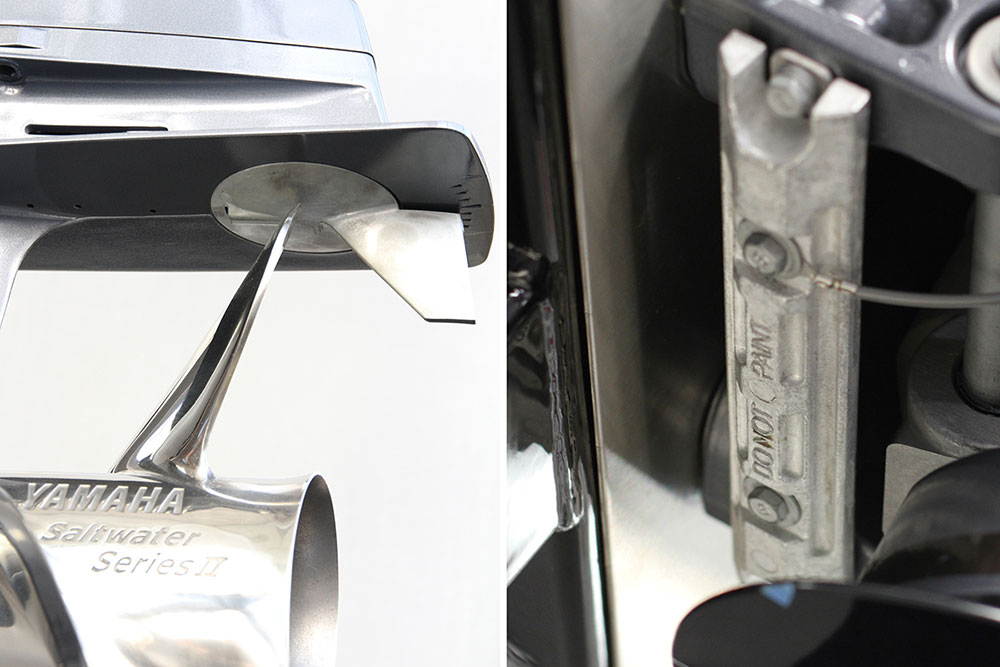
The two most common types of corrosion in the marine environment are galvanic and stray current corrosion.
Galvanic corrosion is a common, natural process between two dissimilar metals (an anode and a cathode) with electrical continuity while immersed in the same electrolyte – in this case water. When two dissimilar metals in physical contact (electrical continuity) are placed in water, they can replicate the properties of a battery, creating a voltage that in turn causes corrosion.
Stray current corrosion is an uncommon, unnatural corrosive process usually caused by a short circuit in your boat’s electrical system. It is much more aggressive than galvanic corrosion and there is no natural protection available, such as anodes. If you suspect your boat is suffering from stray current corrosion, have your dealer perform an inspection immediately. The only solution is to find the source of the electrical issue and resolve it before serious corrosion or complete electrical failure occurs. In this article, we won’t go into detail regarding stray current corrosion as it’s not likely to attack equipment that is kept in good mechanical condition.
Defensive Measures
It’s a common misconception that corrosion is unlikely if all the metals in a particular assembly are identical. Unfortunately, this does not take into consideration the fact that most of the components on your outboard are alloys and not pure metals. The different metals in a particular casting, like a propeller or drive housing, can react with each other and begin to break down if not protected against galvanic corrosion.
The most common defenses against galvanic corrosion are paint and sacrificial anodes. Paint is the initial layer of protection and possibly the most effective where applicable – just keep in mind the paint must be designed for protection against galvanic corrosion. Your average paint from the hardware store may be insufficient and some components, like propellers, may not lend themselves to painting in most applications. The biggest downside to paint is that it’s susceptible to chipping and scratches, leaving your components vulnerable to corrosion.
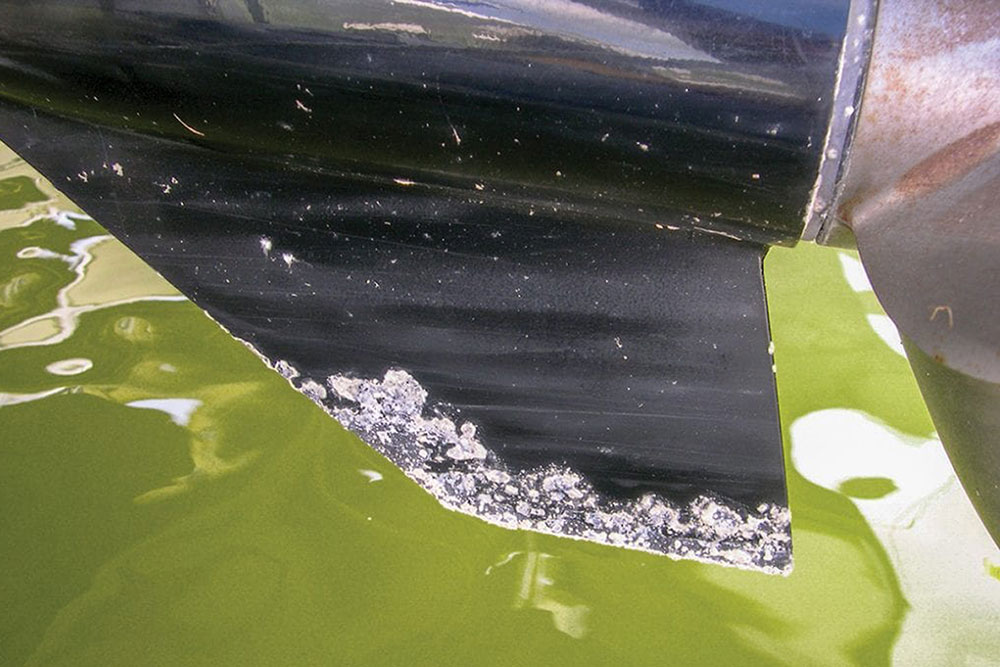
Paint is susceptible to damage, leaving components vulnerable to corrosion
Since galvanic corrosion will always attack the most active (least noble) metals first, the addition of a less noble metal as a replaceable anode is a convenient solution to protect other components. Anodes are usually made from an aluminum/zinc alloy, which will work well in most types of water. Consider switching to a pure magnesium anode if your motor is likely to spend its life in freshwater. Sacrificial anodes are the ideal secondary form of protection as they can often be applied to any surface and are easily field serviceable.
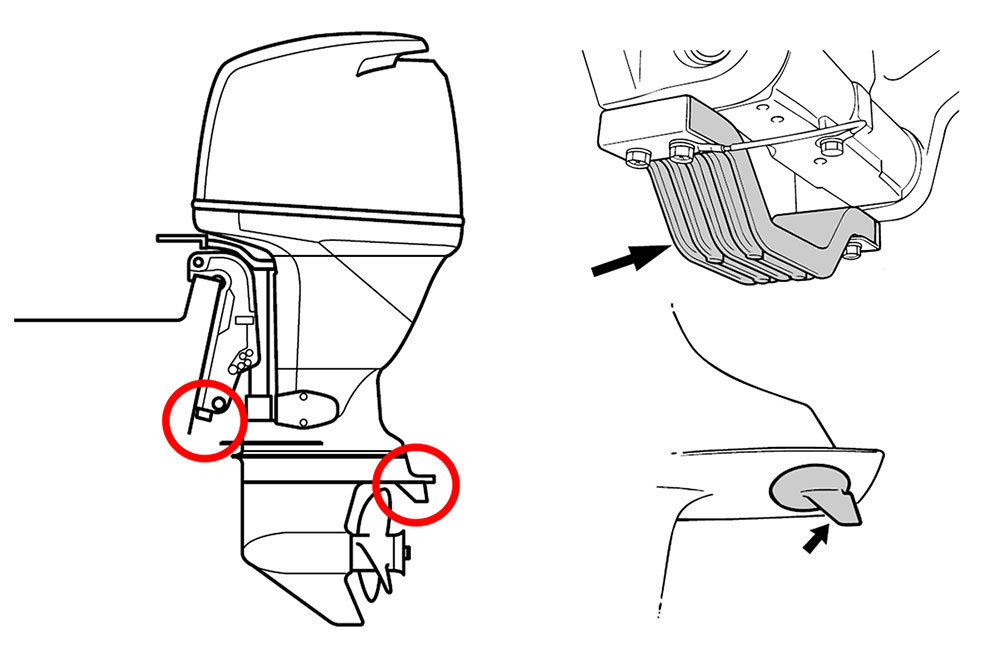
Common locations for anodes
Most outboards will have two anodes, one serving double duty as a trim tab and the other at or near the transom. It’s recommended to replace an anode once it has corroded to approximately 50% of its original size. Remember to pay particular attention to the trim tab anode as it also helps correct for prop walk, allowing your boat to track straight. The fin on your trim tab anode can be corroded by over 50% while the rest of the anode is fully intact, causing your boat to gradually drift to one side under power, so regular replacement may be beneficial. Certain outboards will also have an engine anode, which typically sits within the cooling system. Consult your owner’s manual for locations specific to your make and model.
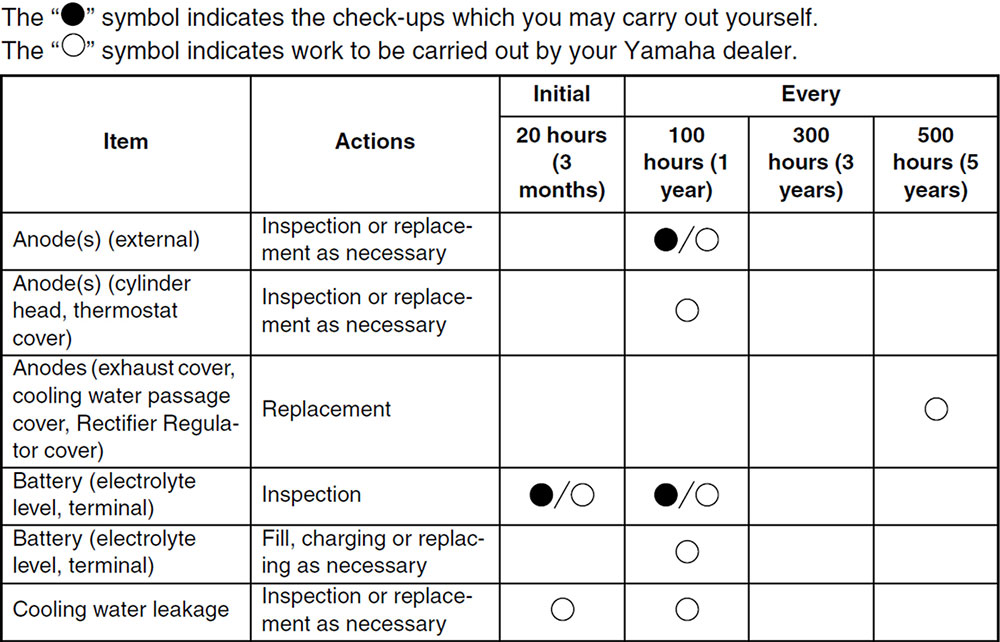
Be sure to consult your owner’s manual or local dealer for recommended maintenance and inspection intervals
Maintenance
Inspect your anodes as often as possible. Most manufacturers recommend an annual inspection but consider that your neighbour at the marina may not be as well prepared as you. Anode depletion can also be accelerated when a properly protected boat is connected by shore power ground wire to other boats or marina structures that do not have adequate anodic protection. If they have neglected their anodes, they may pose a corrosive hazard to your motor, which could significantly increase the corrosion rate of your anodes when docked in proximity.
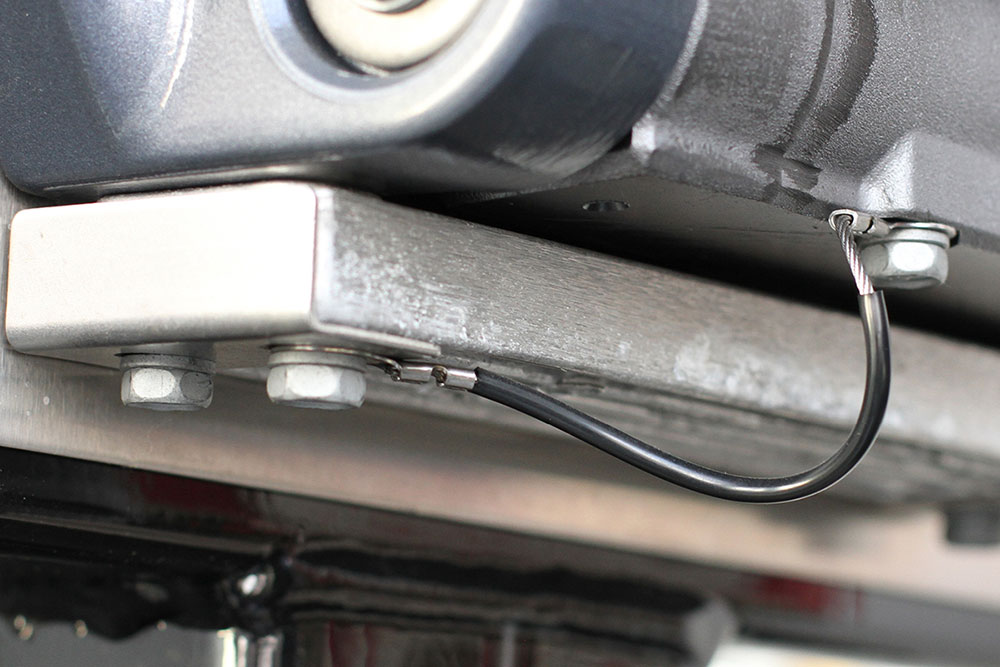
In some cases, electrical continuity is completed by a wire lead
Also remember that anodes must have electrical continuity with the vulnerable components to be effective, so ensure you always install the new anodes as outlined in your owner’s manual or consult your local dealer. Electrical continuity can be achieved by either a wire connection or simple physical contact. If you wish to confirm continuity, you can often run a test with a simple multimeter.
By following these steps, choosing the correct anode and conducting regular inspections you can provide your outboard motor the best possible protection against corrosion.


 All Yamaha News